
A while ago I designed my own earring display cards because I couldn’t find any with the features I wanted. A couple of students at my recent Polymer Clay Surface Design Techniques class were interested in how to make them, and since I’d had a vague idea of sharing the technique anyway I thought it was finally time to take the plunge (or a tiptoe!) into the world of social media and provide the information as a blog post.
So here I go!
Instructions are given below. They’re also summarised in the downloadable PDF diagram.
Features
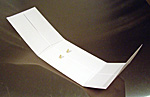 Easy to use – opens out for easy earring attachment and removal, simply tuck a flap in to reassemble
- Easy to package – folds up for boxing or wrapping with earrings attached
- Easy to store – stores flat
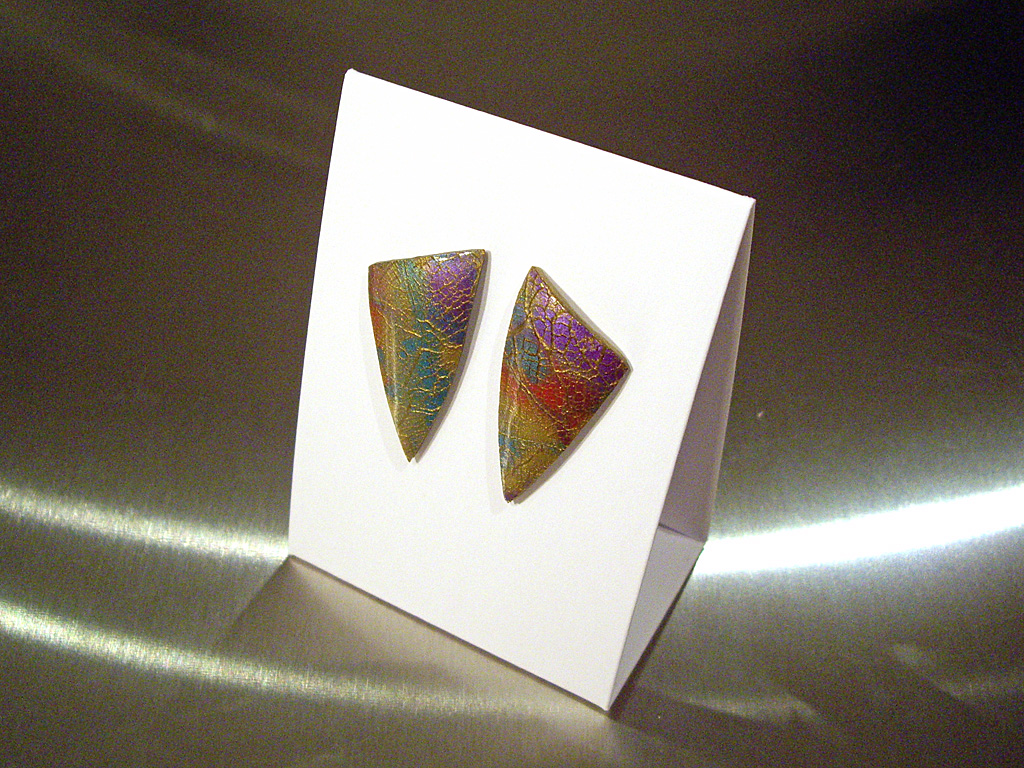
- Versatile – use standing (high) or reclining (low); works well for brooches too
- Stable – won’t tip forwards with heavier or longer earrings
- Sturdy – reinforced against bending and buckling, design prevents splaying
- Tidy – no cut edges visible
- Economical – made from cardstock
- Customisable – use whatever colours you like, leave them plain, decorate them, add your name or logo, put holes where you want them, etc.

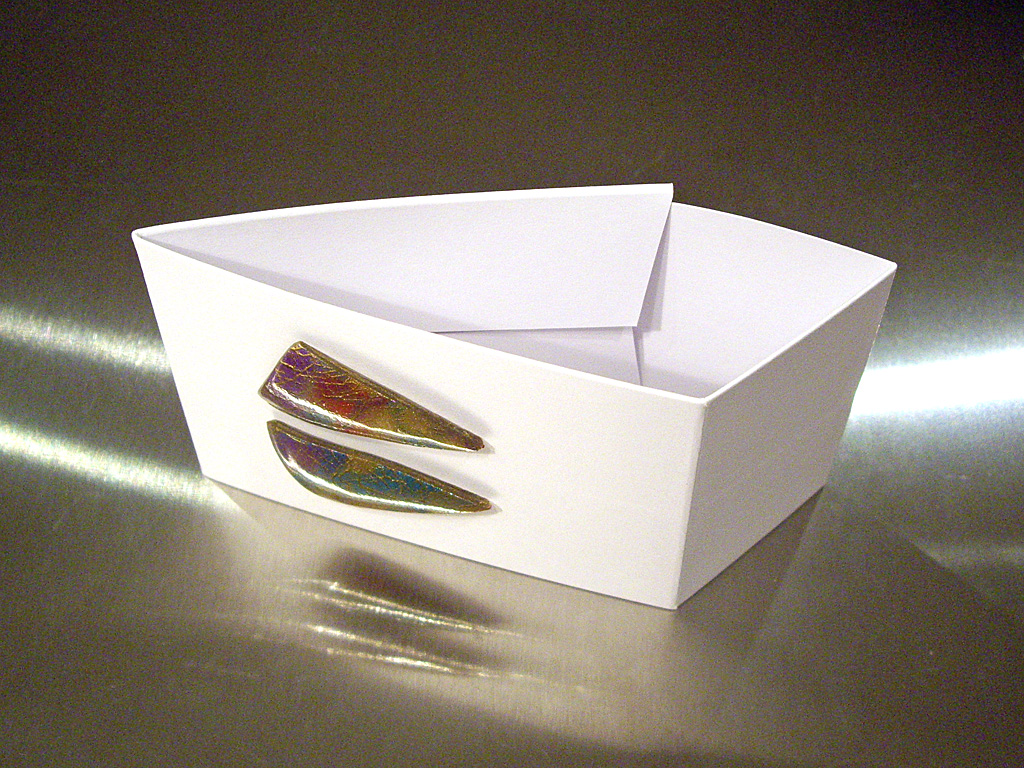
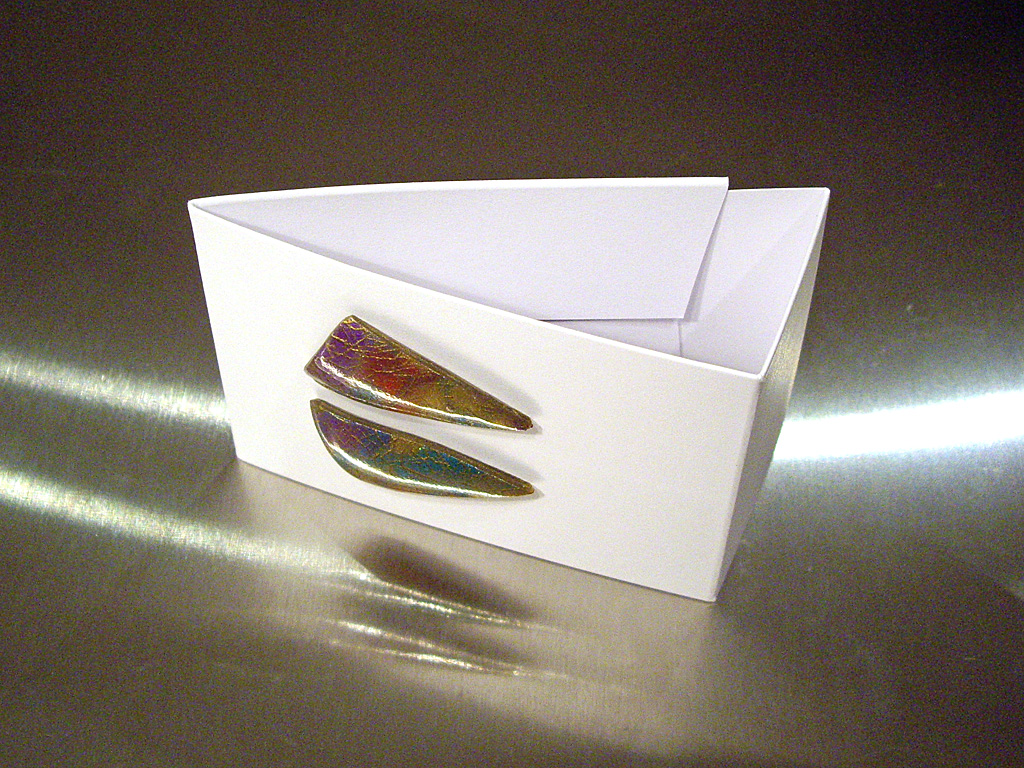
I also make my own matching boxes to pop these into.
Supplies
- Cardstock, plain or decorated in your choice of colour or pattern
- Double-sided sticky tape, or another adhesive suitable for use on cardstock.
For cardstock, I mostly use 200-210gsm Quill XL MultiBoard. It’s inexpensive, easily accessible in Australia from Officeworks, and is available in several sizes and many colours; I normally get A4 in packs of 100 sheets in black and white. Textured cardstock looks great too.
I like double-sided sticky tape because it’s only sticky when you want it to be and the various widths available are very convenient. You could also use a strong tape-runner style adhesive or a liquid glue… just make sure it’s relatively strong, particularly for the area where the assembly flap tucks in.
Tools
Ideally:
- Paper trimmer
- Scoring board and stylus
- Bone folder
- Scissors or paper snips
- 1/16″ hole punch (or a larger size for clip-on earrings or brooches).
But the following are sufficient:
- Scissors
- Ruler
- Something to score the cardstock with
- Something for piercing holes in the cardstock.
Instructions
NOTE: I’ve used imperial measurements (inches) because most paper trimmers and scoring boards are calibrated that way. It’s weird at first if you’re used to the metric system but you do get used to it. Let me know if you’d like a metric version too, for instance if you’re using ruler and scissors or have a metric scoring board.
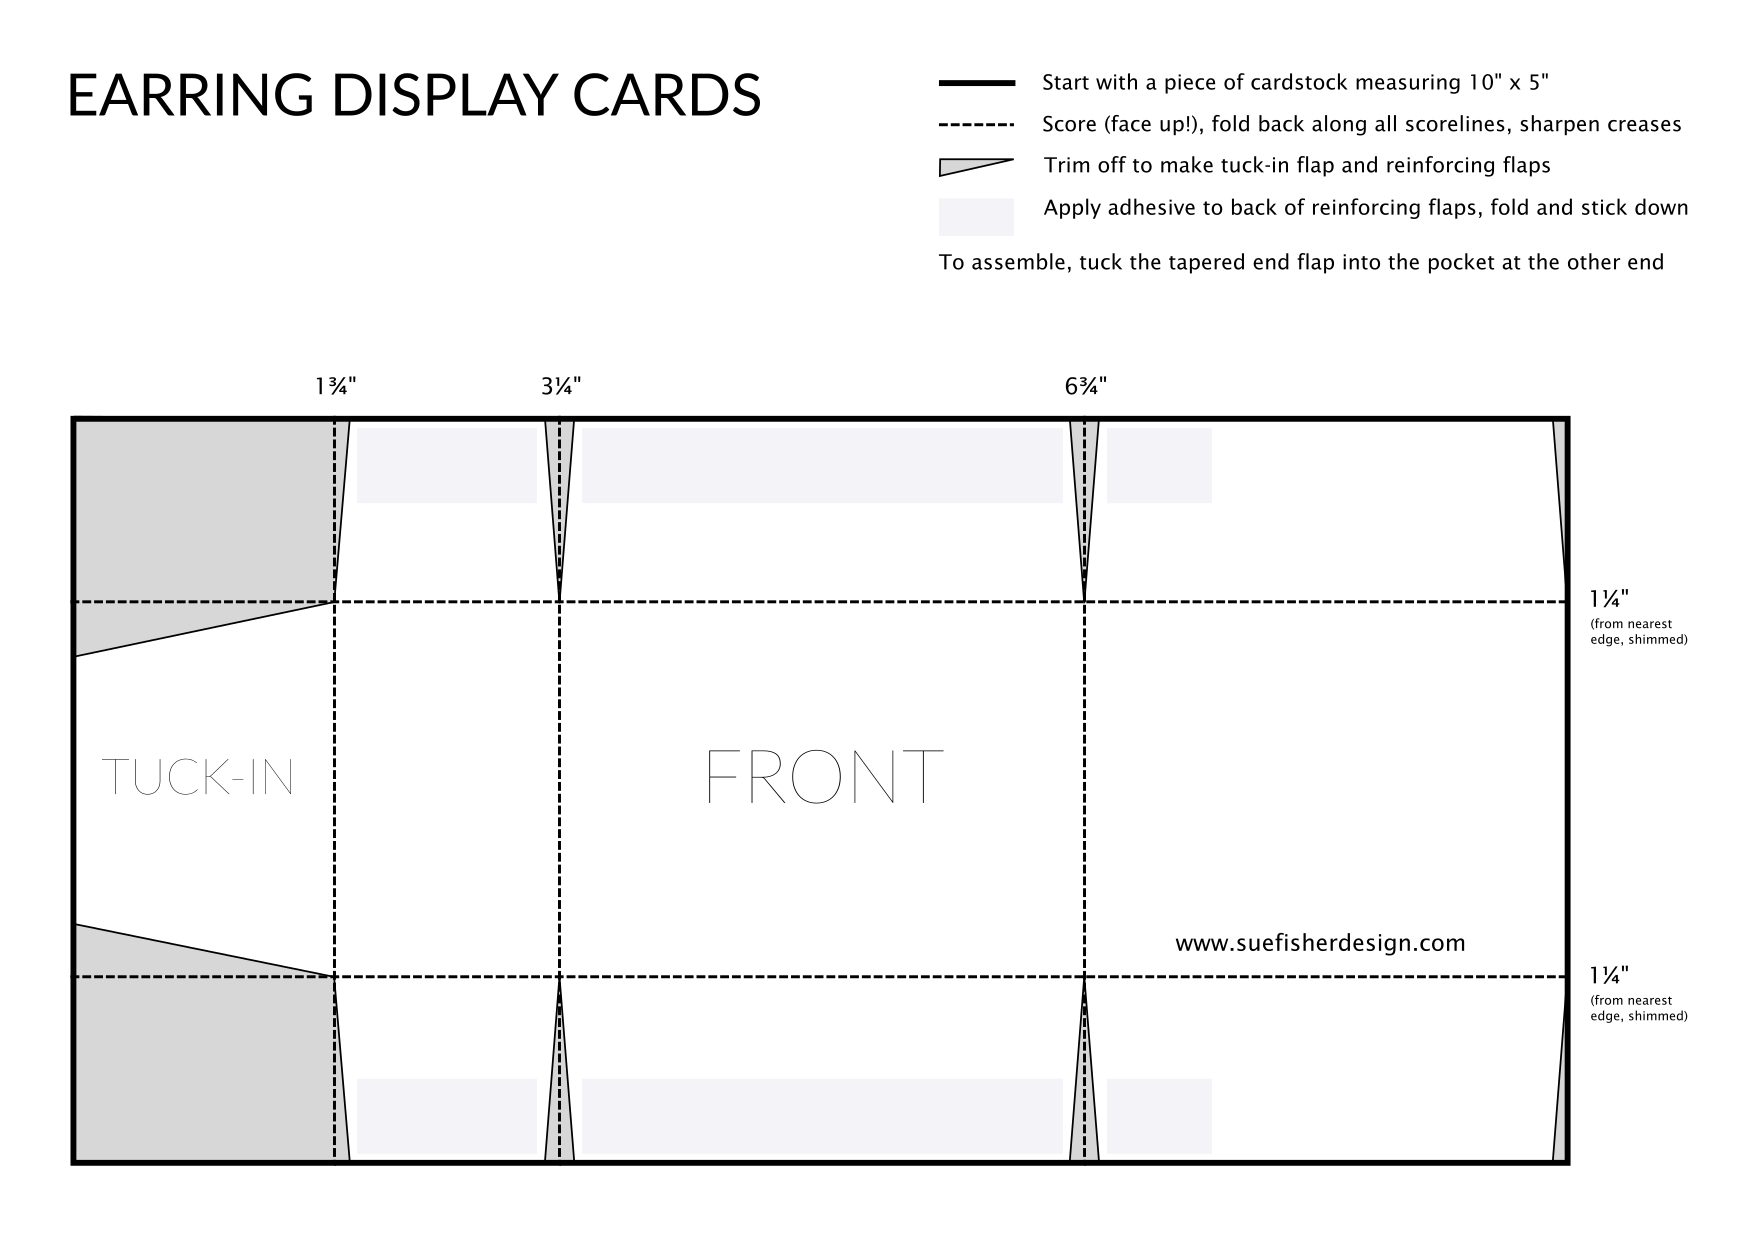
Click the image for a large version with brief instructions, or click HERE for the PDF version
- Cut a piece of cardstock measuring 10″ x 5″.
- With the cardstock face up and a LONG side at the top, score at 1¾”, 3¼” and 6¾”.
- With the cardstock face up and a SHORT side at the top, score at a shimmed (slightly reduced) 1¼”, then rotate the cardstock 180° so that the other short side is at the top and score it the same way.
- If you’re using a scoring board, you can either “shim” it with a double thickness of cardstock placed against the paper alignment guide, or just shift the cardstock away from the alignment guide by a very small amount.
- If you’re using a ruler, use a measurement very slightly less than 1¼”.
- Fold along all the scorelines, pressing firmly with a bone folder to get nice sharp folds. It’s easiest to do the long scorelines first.
- Cut the sides and the end with the smaller rectangle into tapered flaps as shown in the diagram.
- The flap at the end is tapered more so that it tucks in easily when the earring card is assembled.
- The reinforcing flaps along the sides just need to be tapered slightly. This ensures the finished product folds up neatly even if things aren’t perfectly aligned.
- Apply adhesive to the BACK of the side flaps as described below. The adhesive should be near the outside edge for best results.
- Apply adhesive along the full length of the four middle flaps. These are the longest and shortest flaps which reinforce the front and base respectively.
- On the remaining flaps (the two furthest away from the end flap), apply adhesive to ONLY the ¾” closest to the longest flaps. Don’t apply adhesive to the rest; these flaps form a pocket for the end flap to tuck into.
- Fold all the side flaps in and stick them down; each pair of flaps should almost meet in the middle. If there’s a big gap between them, shim less when scoring with the short side at the top; if they overlap, shim more.
- Decide whether you want to use the card standing (high) or reclining (low), then punch holes into the front panel to suit your earrings or brooch.
- For earrings for pierced ears, a 1/16″ hole punch is ideal.
- For clip-on earrings, use a larger hole punch to accommodate the clip backs. If you can find a small oval or skinny rectangle punch or die that’s even better.
- For brooches with hinged pinbacks, punch holes large enough for the pinback hinge and clasp to stick through. Brooches with a single push pin can usually be pushed straight into the card: they’ll make their own hole.
To assemble for display, simply tuck the tapered end flap into the pocket at other end of the card.


Tips
When scoring paper or cardstock, the side you want to see should face upwards: press your scorelines into the “good” side, then fold away from the scorelines and toward the “hills” on the other side. This gives a smooth, clean fold and avoids the cracking that can occur when you fold the paper the other way. The best tip I’ve seen for remembering the correct way to fold after scoring is: “The hills are on the inside”.
When I make a bunch of these earring cards I usually stop at the point where the side reinforcing flaps are stuck down. I then grab them as I need them, decide whether they’ll be standing or reclining, and punch holes exactly where needed for the items I want to display.
Use a strip of scrap cardstock to help punch your earring holes an even distance from card edge. It’s easier to line your punch up with the cardstock strip than to just eyeball where the holes should go. (An alternative is to deliberately position the holes asymmetrically, avoiding the whole alignment bother in the first place!)
If you want to stamp or emboss your name or logo, keep in mind that the top of the front panel in standing mode is the bottom of the front panel in reclining mode. While it’s easiest to stamp or emboss before any adhesive is applied, you might prefer to wait until you’ve decided which way you’ll use the cards. (Or you can just make two batches, one each way.)

Great ideas, I love your blog!! :)
Keep up the great work- I subscribed and look forward to seeing more you post!
Love,
Isabella
This looks great. The white is the perfect backdrop to the beautiful earrings.
Thank you, Monika! :)
They could be made with any colour or decoration, but I really like plain white and plain black.
Thank you for such detailed instructions Exactly what I was looking for
Great idea. thanks for knowing just what I need!
I’m getting ready to try this! Thanks.
I have been looking for something like for a while and then came across your instructions. So beautiful and simple to make.
Would be nice if you can post the Box instructions as well. Thank you so much.
I have been looking for something like for a while and then came across your instructions. So beautiful and simple to make.
Would be nice if you can post the Box instructions as well. Thank you so much.